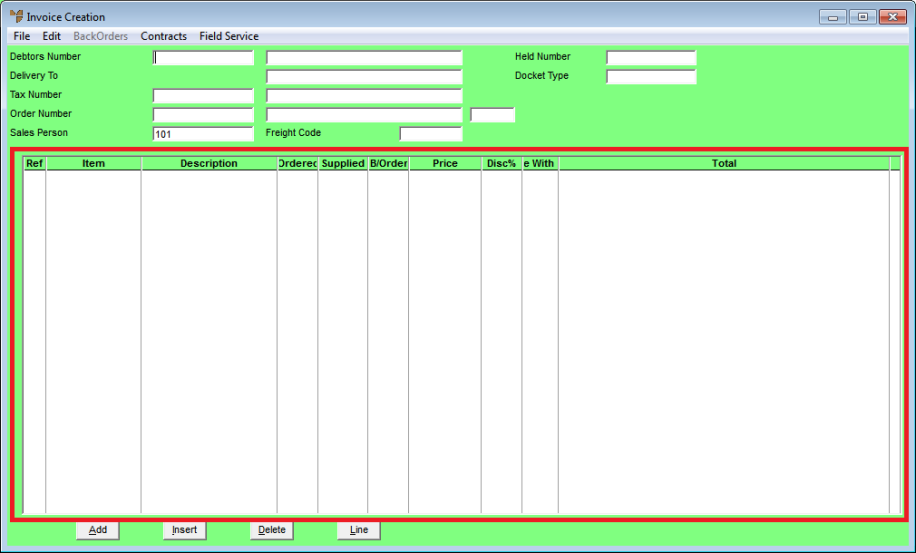
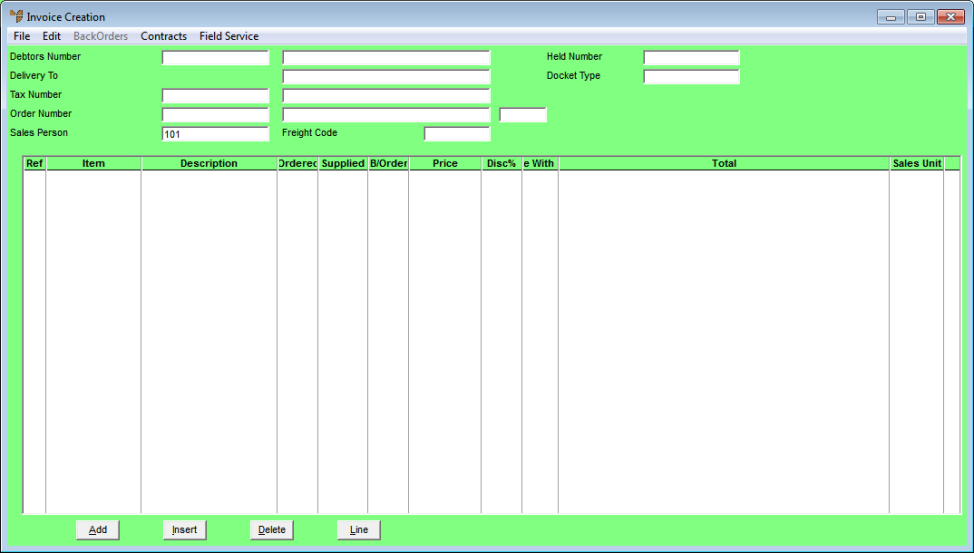
Transaction entry screens – i.e. screens for processing customer orders, credit notes and supplier orders – can be customised to show the line summary details as you require. This is referred to as "editing the select box" – the large white box at the bottom of the screen that displays the summary lines, e.g. the items in an order (see the area highlighted on the Invoice Creation screen below).
This procedure describes how to change the size of the select box on the Invoice Creation screen to show more of the item details, and then add the Line Item Sales Unit column. It also describes how to change the size and order of the columns.
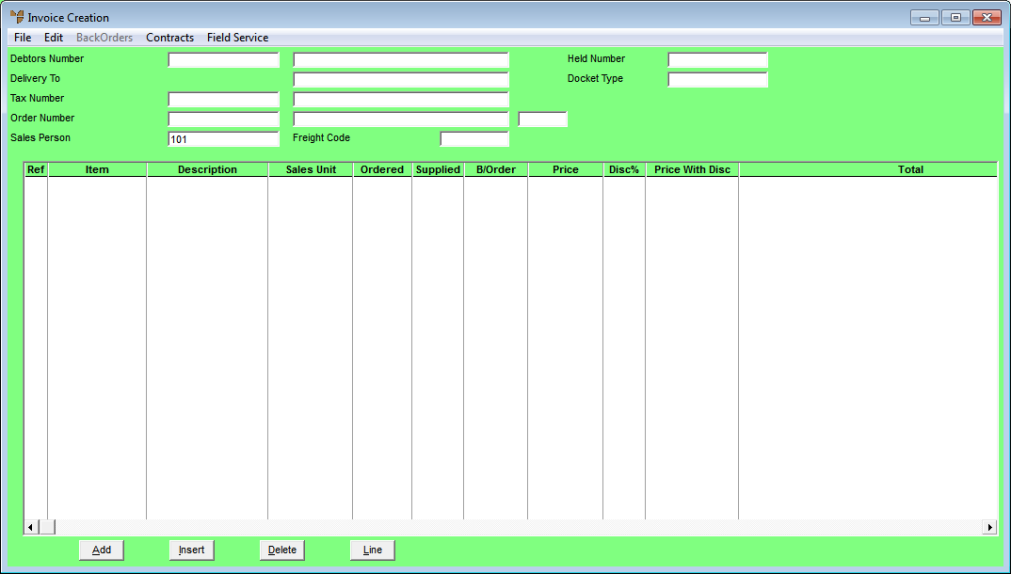
Micronet displays the Invoice Creation screen.
|
|

|
Technical Tip If the Debtor Selection screen displays, press the Esc key to clear it and right click again. |
Micronet displays a pop-up menu.

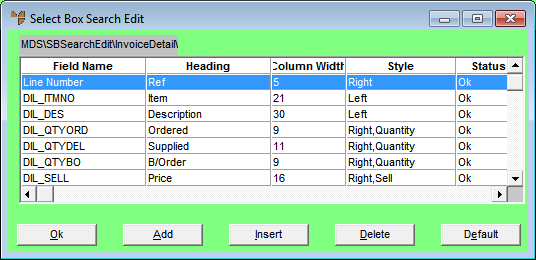
Micronet displays the Select Box Search Edit screen.
|
|
|
Technical Tip If you cannot select EDIT SELECT BOX, it means you do not have the required user security to customise transaction entry screens (i.e. the Edit Dialogue Controls option on the Allow Editing of Supervisor Functions screen in your user ID is unticked – refer to "Maintenance - Edit UserIDs - 1. Main"). |
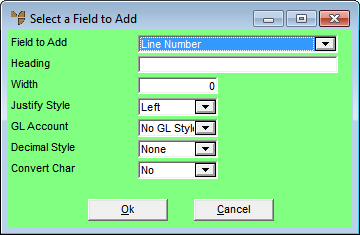
Micronet displays the Select a Field to Add screen.
|
|
|
Technical Tip You can type in the field name to find it quickly. |
The Sales Unit field is now displayed at the right of the select box.
|
|
|
Technical Tip You might need to make the screen wider to see it. |
Sales Unit Field
|
|
|
Technical Tip If you edit your screen and are not happy with the changes, display the Select Box Search Edit screen and select the Default button. If this doesn't eliminate all the changes you made, you may need to edit or delete your Registry settings. Contact your Micronet reseller or Micronet Service Desk for more details. |